Frequency Separation
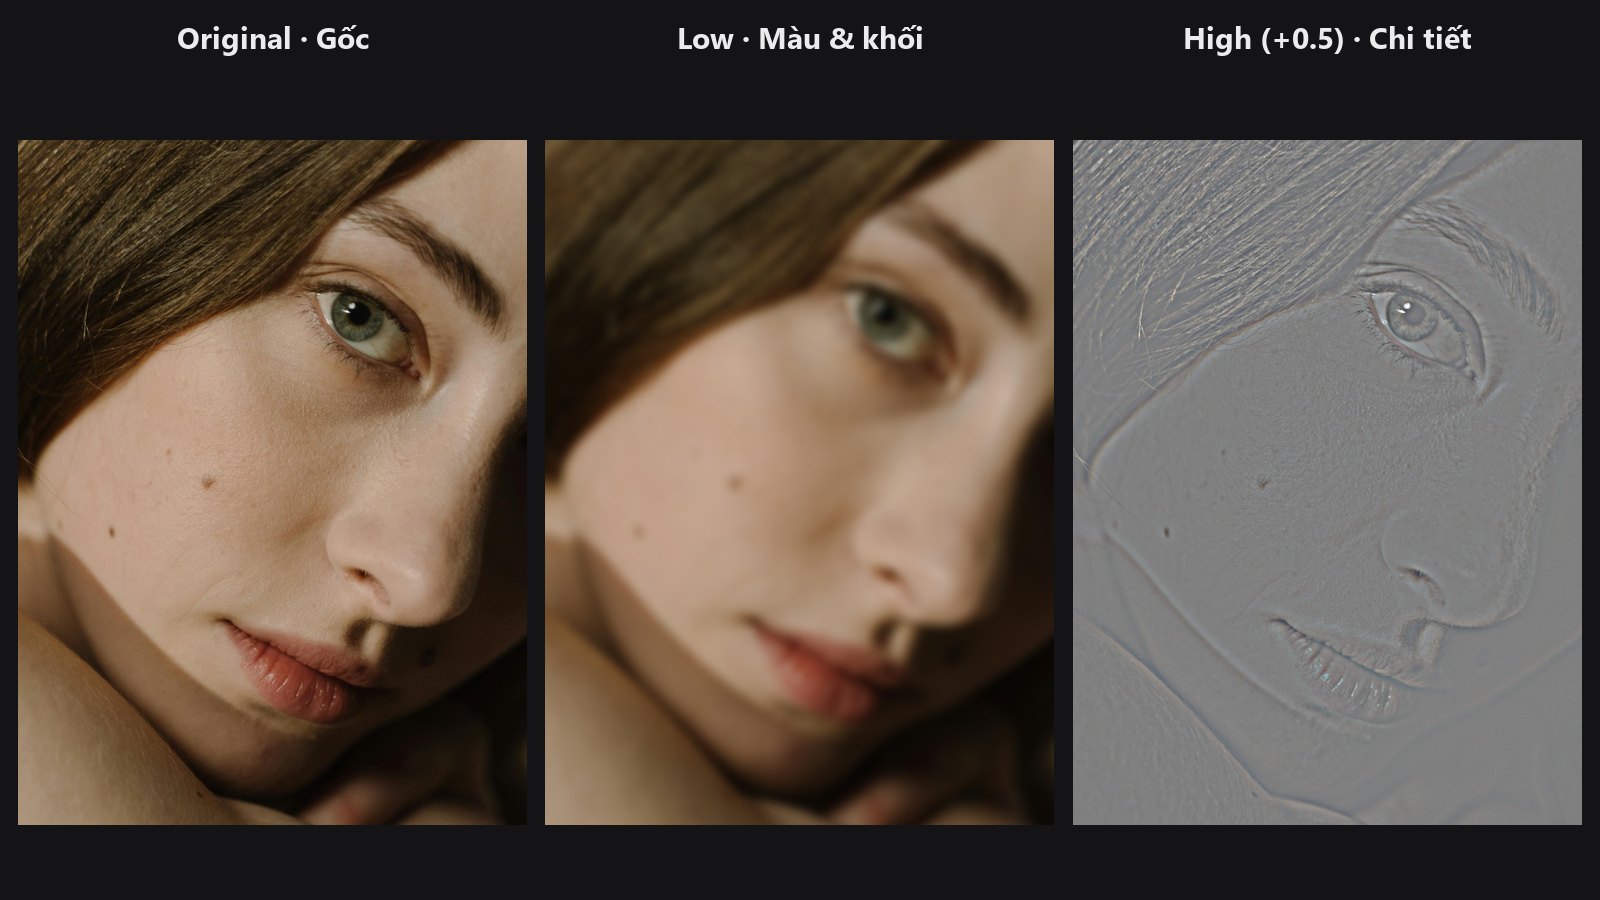
Splits an image into two layers: low (soft colour, light and shadow) and high (fine detail such as pores, hair and fabric texture). You can then fix blotchy skin tone on one layer without touching texture on the other.
| In ComfyUI | Add Node → ComfyUI-JH-PixelPro → filters → GPU Frequency Separation |
| Good for | Skin retouching, removing colour blotches while keeping pores, texture-only sharpening or softening |
When to use it
Frequency separation is the classic portrait-retouching technique:
- Low frequencies are the big, slow changes: skin colour, shading, make-up tone. This is the image blurred with a Gaussian filter.
- High frequencies are the small, fast changes: pores, stubble, eyelashes, fabric weave. This is everything the blur removed.
Retouch colour problems on low, texture problems on high, then put the two back together. A larger radius moves more of the picture into high.
Why high can be negative
high is the original minus the blurred copy. Where a pixel is brighter than its surroundings (a bright pore edge, a hair highlight) the result is positive. Where it is darker (a pore, a shadow in a crease) the result is negative. On average the values sit around zero. An image can only store values from 0 to 1, so a negative value cannot be shown as a normal picture: the preview looks dark or oddly coloured. That is expected. The pieces still add up exactly: low + high = original.
Rebuilding the image
Use Frequency Recombine to put the layers back together. Blend nodes that clamp values to 0..1 (including the layer nodes in this pack) throw the negative half of high away, so the sum no longer matches the original.
Quick start
Load Image→ GPU Frequency Separation.- Leave
radius = 8,sigma = 0,precision = float32. - Send
lowtoPreview Imageto see the smooth layer. Thehighpreview looks dark; that is normal. - Edit
loworhighwith your own nodes, then join them with Frequency Recombine. Atdetail = 1it restores the original exactly.
Settings
| Setting | Default | What it does | Tip |
|---|---|---|---|
radius |
8 (1 to 128) |
Size of the blur in pixels. Detail smaller than this goes to high. |
Small (3 to 6) for fine texture, larger for bigger blotches. Must be at most half of the shorter image side. |
sigma |
0.0 (0 to 50) |
Blur softness. 0 means automatic: radius / 2. |
Leave at 0 unless you need to match another tool. |
precision |
float32 |
float32 rebuilds the original almost exactly. float16 is about twice as fast on a modern GPU with a rebuild error around 0.001. |
Use float32 for final work. |
| Output | Type | Meaning |
|---|---|---|
low |
IMAGE |
The blurred, smooth layer. |
high |
IMAGE |
The detail layer. Can contain negative values. |
Tips from retouching
- Pick
radiusrelative to image size. The same 8 px is fine detail on a 1 MP image and almost nothing on a 24 MP image. - Smooth skin tone on
lowwith Skin Smoother; leavehighalone so pores survive. - Use Detail Mask when you need to protect textured areas.
- Avoid
float16on CPU. It can be slow and less precise there.
Under the hood
low is a Kornia gaussian_blur2d with kernel size 2 × radius + 1, sigma radius / 2 unless overridden, and replicate borders. high = working − low in the chosen precision. Input must be 3-channel RGB in 0..1; radius above half the shorter side raises an error. A sigma larger than radius / 2 logs a warning because the kernel truncates the tail of the Gaussian. Source: core/frequency.py and nodes/frequency_node.py.
Related nodes
Example workflow
Frequency Separation example workflow. The workflow splits the portrait, previews low and high, and rebuilds the image with Frequency Recombine at detail 1.6. It uses only core ComfyUI nodes and this pack. Copy workflows/sample_portrait.jpg into ComfyUI/input/.