Sub-Pixel Mask Refiner
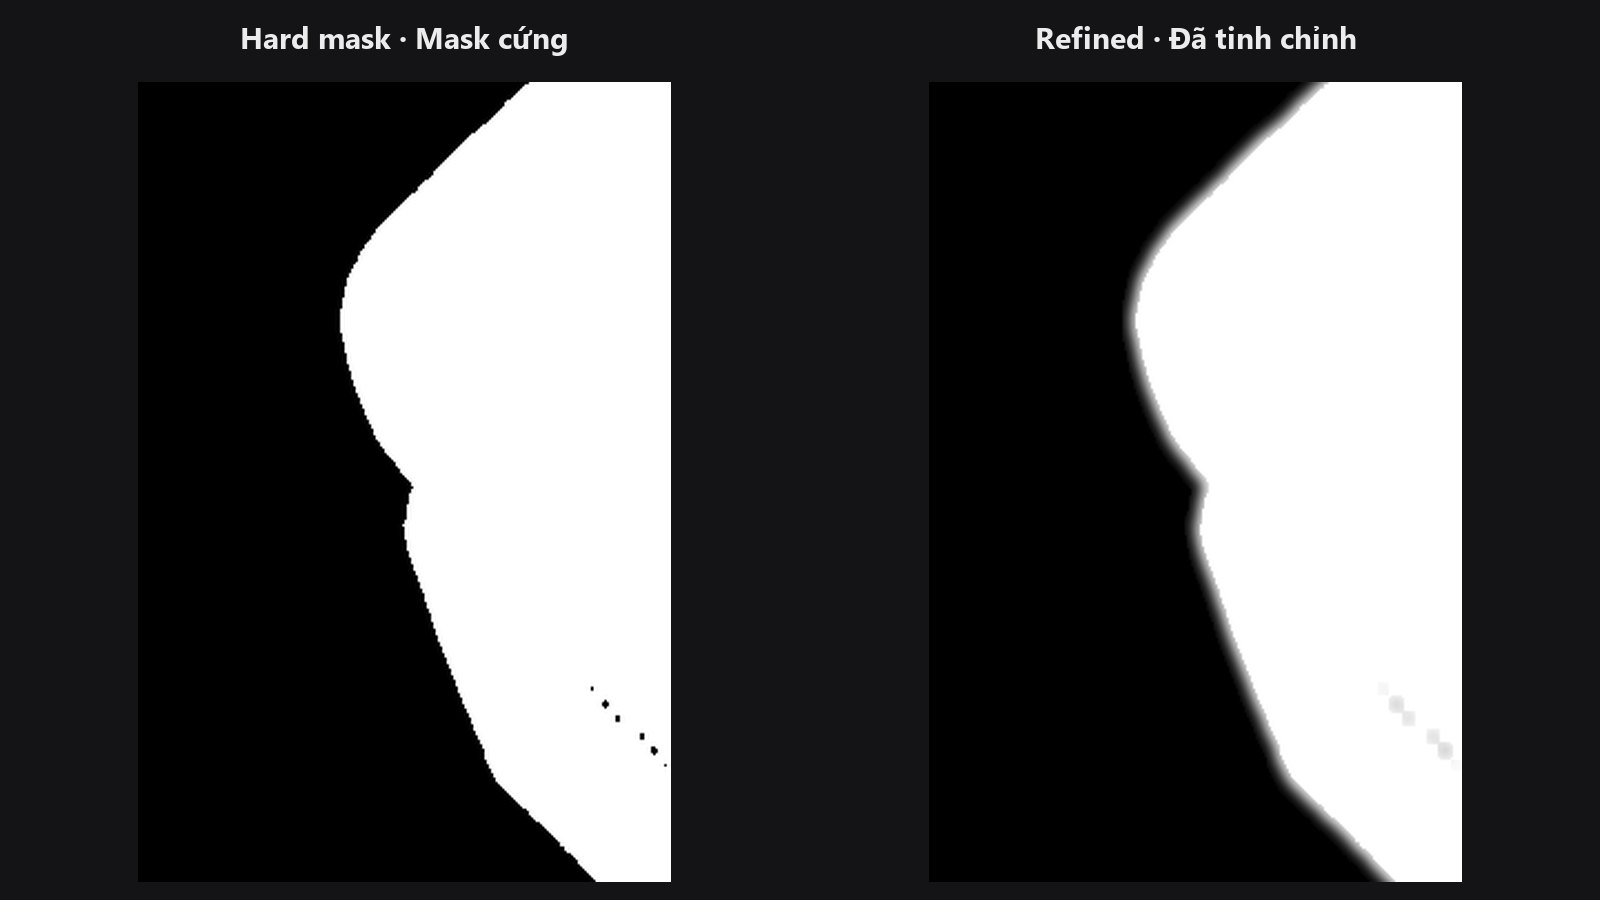
Takes a jagged, hard-edged cutout mask and gives it a smooth, feathered edge, while keeping the middle of the subject fully opaque and the background fully clear.
| In ComfyUI | Add Node → ComfyUI-JH-PixelPro → mask → Sub-Pixel Mask Refiner |
| Good for | Softening SAM or rembg cutouts, removing the "sticker" look, preparing a mask for compositing |
When to use it
A binary mask has only two values: 0 (not selected) and 1 (selected). Every edge pixel is either in or out, so the edge looks stair-stepped and pasted on. A soft mask (also called an alpha) has in-between values along the edge, which blends the subject into the new background.
A plain blur would soften the edge, but it would also eat into the subject and let the background bleed in. This node is smarter: it marks a safe zone inside the subject and a safe zone outside it, and only feathers the thin band between them. Use it when your mask is already roughly in the right place and you only need a better edge. If the edge has to follow fine detail like hair, use Edge-Aware Mask Refiner or Alpha Matte instead.
Quick start
Load Image→Convert Image to Mask(or any node that outputs a mask).- Connect the mask to Sub-Pixel Mask Refiner.
- Start with the defaults (erosion 2, dilation 4, feather 2.0). Raise
feather_sigmafor a softer edge. - Check the result with Mask Preview.
Settings
| Setting | Default | What it does | Tip |
|---|---|---|---|
erosion_radius |
2 | How far to pull back from the edge to find the "definitely inside" core. That core stays fully white. | 0 to 64. Bigger = a wider feathered band on the inside. |
dilation_radius |
4 | How far to push out from the edge to find the "definitely outside" zone. That zone stays fully black. | Keep it equal to or larger than erosion_radius. |
feather_sigma |
2.0 | Softness of the edge, in pixels. | 0.1 to 32. Try 1 to 4 for portraits. |
threshold |
0.5 | Values above this count as selected before anything else happens. | Only matters if your input is not already pure black and white. |
Output: refined_mask (MASK), same size as the input.
Tips from retouching
- Feed it a clean binary mask. If the mask has specks or holes, run Mask Cleanup first.
- Set
dilation_radiusa little larger thanerosion_radiusso the soft band is centred on the original edge. - Setting both radii to 0 turns the node into a plain Gaussian blur of the mask. That is rarely what you want.
- For hair and fur, a feather alone is not enough. Build a Trimap and use Alpha Matte.
Under the hood
The mask is binarised with mask > threshold. A Gaussian blur of the binary mask gives the feather. An eroded copy is the inside core and 1 - dilated copy is the outside core. The output is inside + (1 - inside - outside) * feather, clamped to 0..1, so the feather only shows in the band between the two cores.
Erosion and dilation use a square window (a sliding max, done with separable max_pool2d), not a round one, so memory stays proportional to the image size even at large radii. The Gaussian kernel is sized to cover about three sigma. A warning is logged when more than 5% of the input pixels are mid-grey, because the node expects a near-binary mask. Source: core/mask_refiner.py.
Related nodes
- Mask Cleanup for removing specks and holes before refining
- Edge-Aware Mask Refiner for edges that follow the photo
- Mask Edge Smoother for smoothing jagged edges while keeping corners
- Mask Preview for checking the result
Example workflow
Sub-Pixel Mask Refiner example workflow. Copy workflows/sample_binary_mask.png into ComfyUI/input/ first.