Skin Smoother
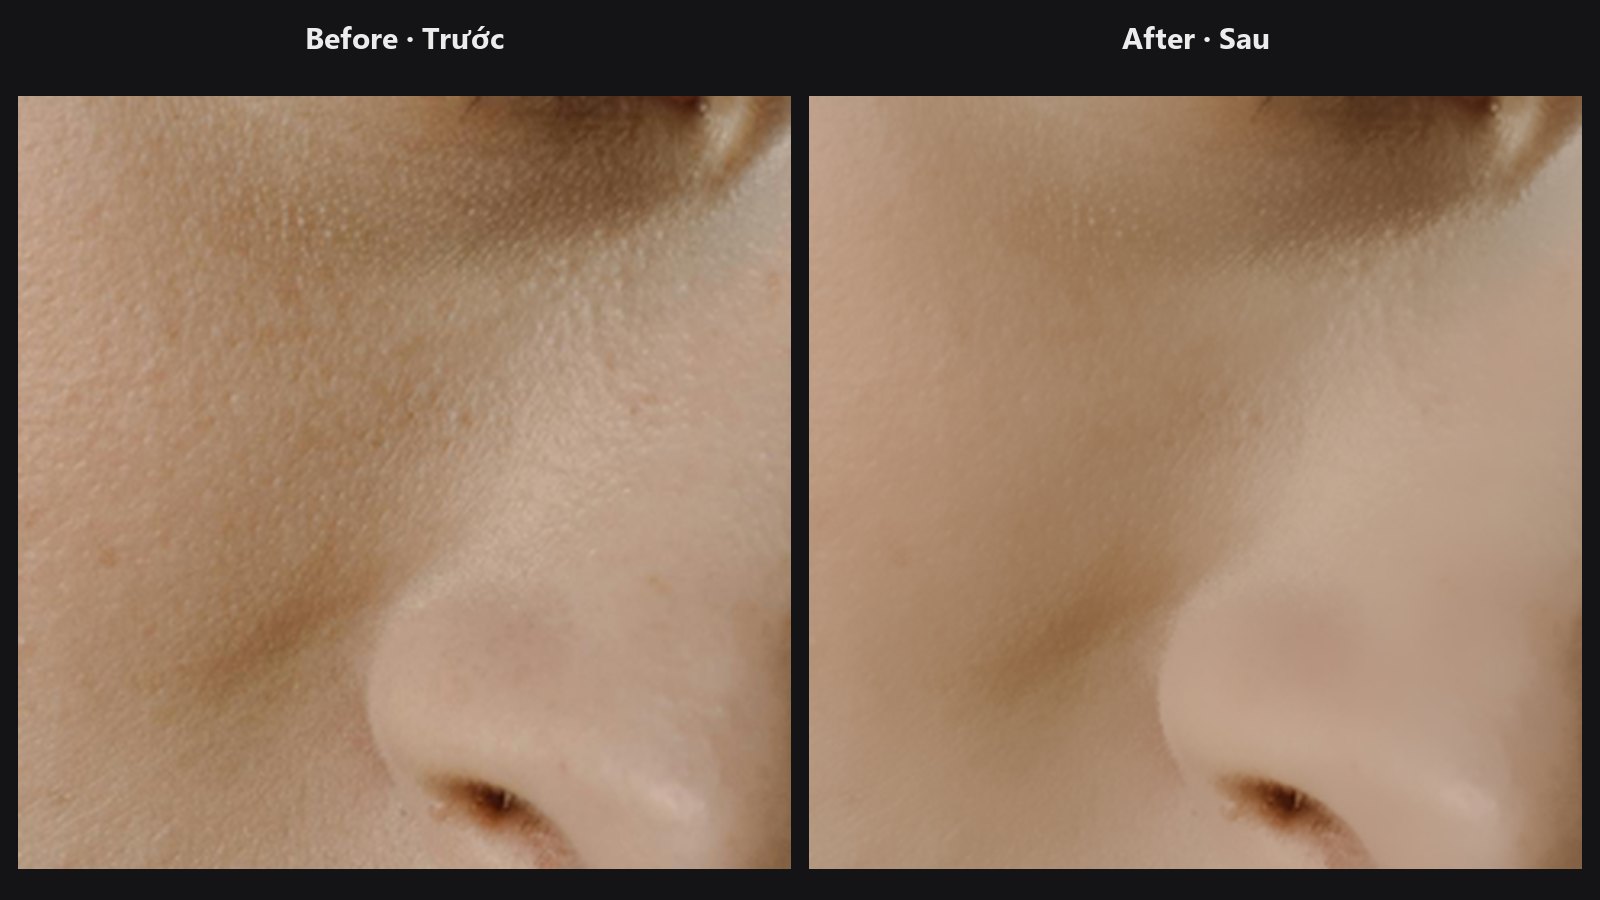
Softens skin tone and small blemishes with an edge-preserving (bilateral) blur. Smooth areas get smoother, but strong edges such as eyelids, lips and hair lines stay crisp, so the face does not turn into plastic.
| In ComfyUI | Add Node → ComfyUI-JH-PixelPro → filters → Edge-Aware Skin Smoother |
| Good for | Portrait skin cleanup, evening out tone, softening texture inside a skin mask |
When to use it
A normal blur softens everything, including the edges you want to keep. A bilateral filter averages a pixel only with neighbours of a similar brightness and colour. Skin (similar values) gets averaged. An eye edge (very different values) does not.
Use strength to mix the smoothed result with the original, like lowering the opacity of a smoothing layer. Typical retouching doses are 0.3 to 0.5.
Quick start
Load Image→ Edge-Aware Skin Smoother →Preview Image.- Start with
strength = 0.4,sigma_color = 0.1,sigma_space = 6. - Turn
tile_modeon for normal photo sizes (see the memory note below). - Connect a skin
MASKtomaskto limit the effect to skin.
Settings
| Setting | Default | What it does | Tip |
|---|---|---|---|
strength |
0.4 (0 to 1) |
Mix between original (0) and fully smoothed (1). | 0.3 to 0.5 for natural skin. 0 returns the image unchanged. |
sigma_color |
0.1 (0.01 to 0.5) |
How different two colours can be and still be averaged. On the 0 to 1 image scale, not 8-bit values. | Small keeps more edges; large smooths across weak edges. |
sigma_space |
6.0 (1 to 8) |
How far in pixels the smoothing reaches. | Lower for small images. For wider smoothing, shrink the image first with a resize node. |
device |
auto |
auto uses CUDA if available, otherwise CPU. cuda fails if there is no CUDA. cpu forces CPU. |
|
tile_mode |
off | Process the image in tiles to limit memory. | See below. |
mask (optional) |
none | Where smoothing applies: white = smoothed, black = original. | A feathered skin mask avoids visible borders. |
Output: image, the smoothed picture (IMAGE).
Memory and tile_mode
The bilateral filter needs a lot of memory: roughly the number of pixels times the square of the kernel size.
- Tile mode off: the node estimates the memory it needs. If that is above about 2 GB it stops with an error and suggests turning on
tile_mode, loweringsigma_spaceor shrinking the image. At the defaultsigma_space = 6the limit is only around 0.1 megapixel, so in practice you will wanttile_modeon for real photos. - Tile mode on: the image is cut into tiles whose size is chosen so each tile fits in a memory budget of about 2 GB. Tiles are at most 512 px wide, and smaller when
sigma_spaceis larger (at the default they come out around 120 px). Each tile includes a margin of neighbouring pixels, so you do not see seams.
The displayed hint on the tile_mode widget still mentions fixed 512 px tiles; the size is actually derived from the memory budget as described here.
Tips from retouching
- Do less, twice, rather than once at full strength. Two passes at 0.3 look more natural than one at 0.8.
- Combine with a skin mask and keep eyes, lips, brows and hair out of it. Skin Tone Tri-Region or the Mask nodes can help.
- Add texture back afterwards with Smart Sharpen (luminance only), or use Frequency Separation first to smooth only the colour layer.
- Check the effect with QA Image Diff to see where pixels changed.
Under the hood
Uses Kornia bilateral_blur with an L1 colour distance and replicate borders. The kernel size is 2 × ceil(3 × sigma_space) + 1. The result is strength × smoothed + (1 − strength) × original, then mixed with the original through the mask. If strength is 0, or the mask is all zeros, the input is returned untouched. Without tiling, the estimated allocation is B × C × H × W × kernel² × 4 bytes and anything above a budget of 2,000,000,000 bytes raises an error. With tiling, the tile side is the largest value that keeps a padded tile within that budget (with a safety factor for Kornia's temporaries), capped at 512 and never below 16. Source: core/smoother.py and nodes/smoother_node.py.
Related nodes
Example workflow
Skin Smoother example workflow. Copy workflows/sample_portrait.jpg into ComfyUI/input/. The workflow shows the original and the smoothed result side by side.