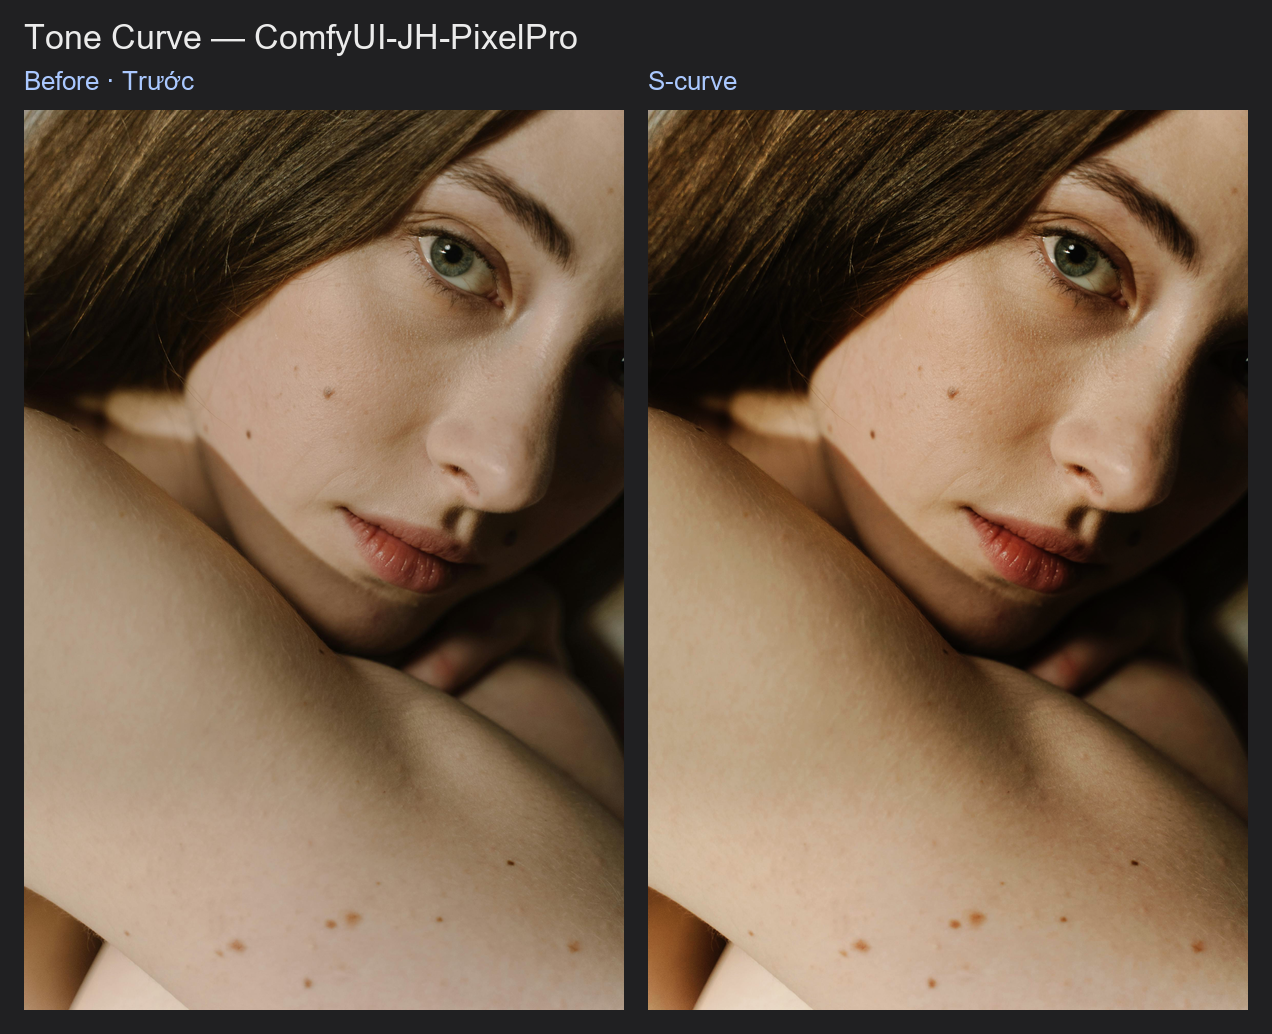
Tone Curve
The familiar curves adjustment: bend the tonal response of the whole image or of a single colour channel, with ready-made presets or your own eight points.
| In ComfyUI | Add Node → ComfyUI-JH-PixelPro → color → Tone Curve (RGB) |
| Good for | S-curve contrast, lifting or crushing shadows, fixing a colour cast channel by channel |
When to use it
A tone curve maps every input brightness to a new output brightness. A gentle S shape darkens the shadows and brightens the highlights, which adds contrast. Raising the lower part lifts shadows for a faded look. Applying a curve to only the red, green or blue channel changes colour balance, which is how you remove a cast or add a split-tone.
This node uses a curve through eight control points, smoothed with a Catmull-Rom spline, so it behaves smoothly and predictably.
Quick start
- Load Image → Tone Curve → Preview Image.
- Choose
preset=s_curve_mildwithchannel=rgb_master. - Lower
strengthto 0.6 if the effect is too heavy. - For your own curve, set
presettocustomand editpoints_json.
Settings
| Setting | Default | What it does | Tip |
|---|---|---|---|
preset |
linear |
linear (no change), s_curve_mild, s_curve_strong, lift_shadows, crush_blacks or custom. |
S-curve for contrast, lift_shadows for a matte look. |
channel |
rgb_master |
rgb_master applies the same curve to red, green and blue (contrast). r, g or b applies it to that channel only (colour balance). |
Use single channels for casts. |
points_json |
a mild S-curve | Your own eight points as [[x1,y1],…,[x8,y8]]. Used only when preset is custom. |
See rules below. |
strength |
1.0 (0 to 1) | Blend between the original (0) and the full curve (1). | 0.5 to 0.8 for subtle grading. |
Output: image_toned, the adjusted picture.
Rules for points_json: exactly 8 points; every value between 0 and 1; the first point is [0,0] and the last is [1,1]; the x values must strictly increase. Anything else raises an error with a clear message. Example (a mild S-curve):
[[0.0, 0.0], [0.15, 0.10], [0.30, 0.25], [0.45, 0.43],
 [0.55, 0.57], [0.70, 0.75], [0.85, 0.90], [1.0, 1.0]]
To lift the shadows, raise the y of the second and third point. To darken the highlights, lower the y of the sixth and seventh.
Tips from retouching
- Take the S-curve in small steps.
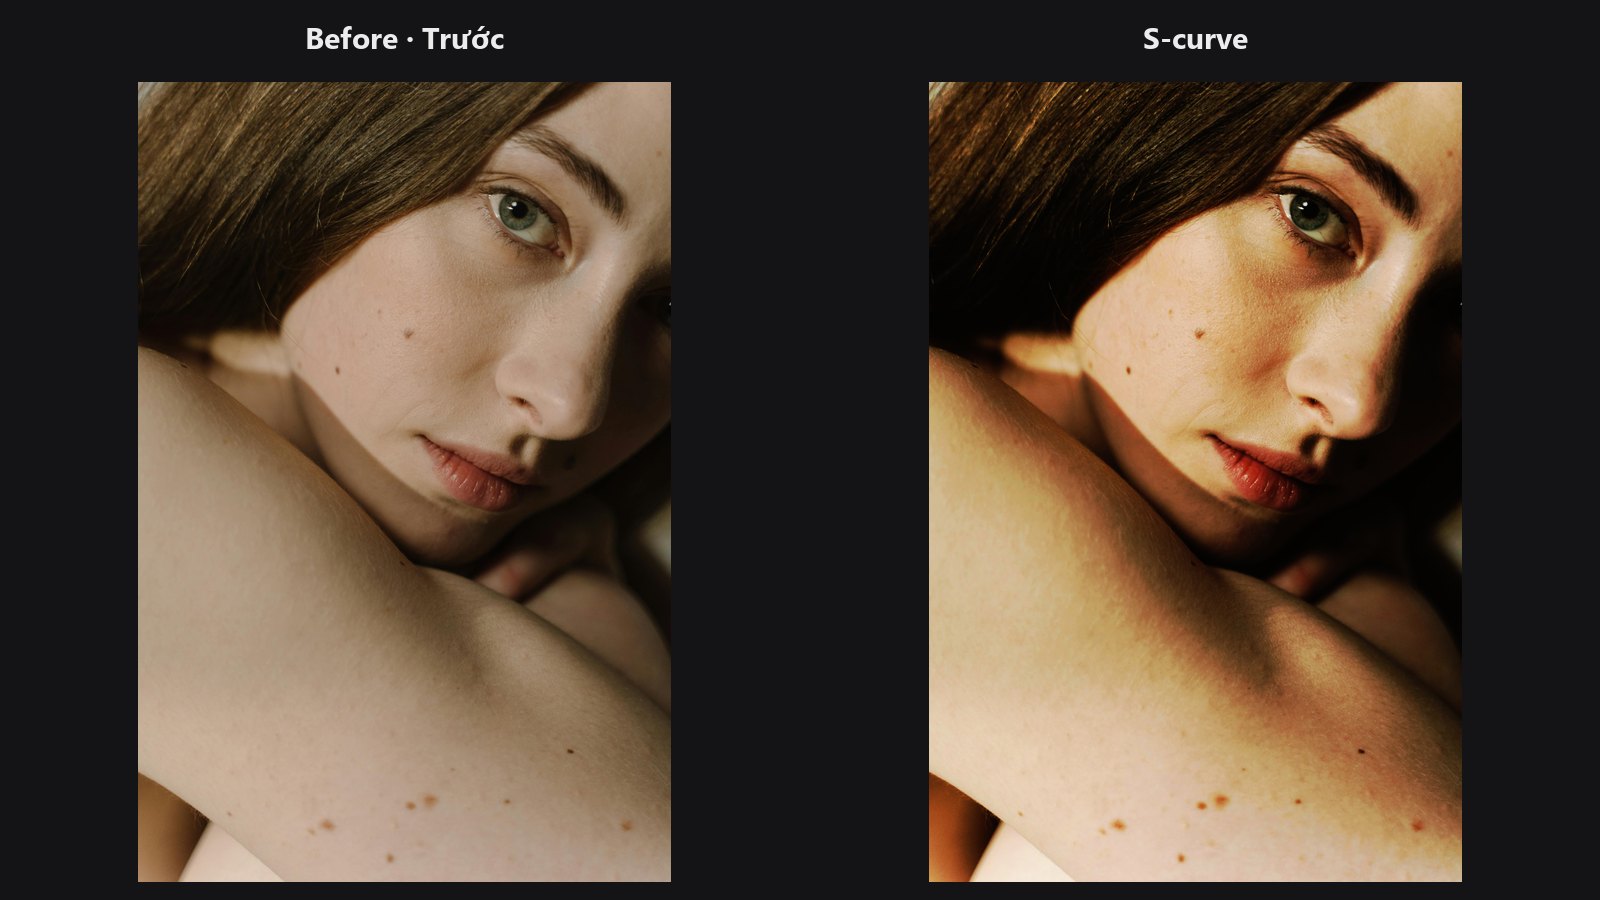
s_curve_mildatstrength0.7 is often all a portrait needs. - To cool the shadows and warm the highlights, apply
channel=bwith a lifted shadow curve, thenrwith a lifted highlight curve. Two Tone Curve nodes in a row works fine. crush_blacksplus Luminosity Masking lets you deepen the shadows without touching skin.- Curves cannot add local detail. Use CLAHE Local Contrast for that.
- To keep a curve as a reusable look, bake it into a LUT with HALD Identity and LUT Export.
Under the hood
The eight points are turned into a 1024-entry lookup table with a Catmull-Rom (cubic Hermite) spline; the endpoints are pinned to 0 and 1. Pixel values are looked up with linear interpolation. With rgb_master the table is applied to all three channels; with r, g or b only to that channel. The result is blended with the input by strength and clamped to 0..1. The curve is applied directly to the RGB values the node receives, not in linear light. Values outside 0..1 are clamped with a logged warning, and strength = 0 returns the input.
Related nodes
- ColorLab: Camera Raw style tone and colour in one node
- Luminosity Masking: apply a curve only to shadows, midtones or highlights
- HALD Identity and LUT Export: save a curve as a LUT
- Color Matcher: match to a reference first, then fine-tune with curves
Example workflow
Tone Curve example workflow. It applies the s_curve_mild preset to the portrait. Copy workflows/sample_portrait.jpg into ComfyUI/input/. It uses only core ComfyUI nodes and this pack.