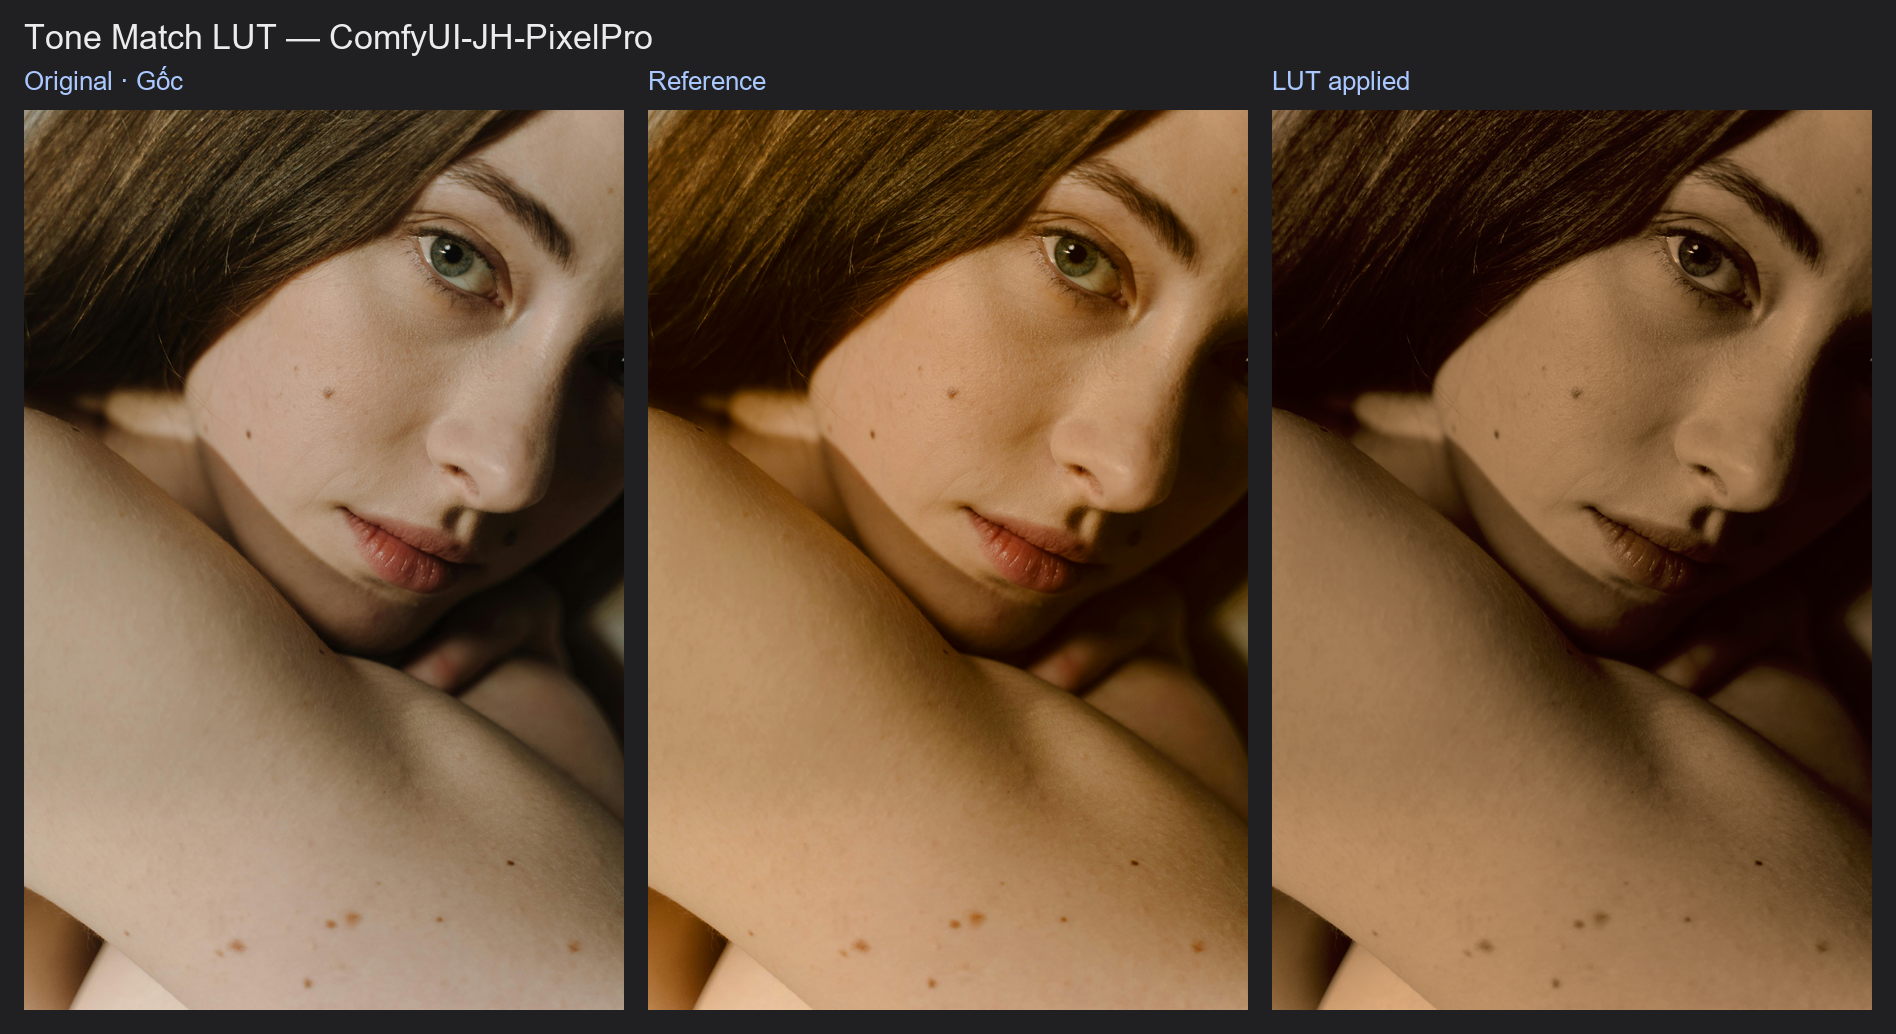
Tone Match LUT
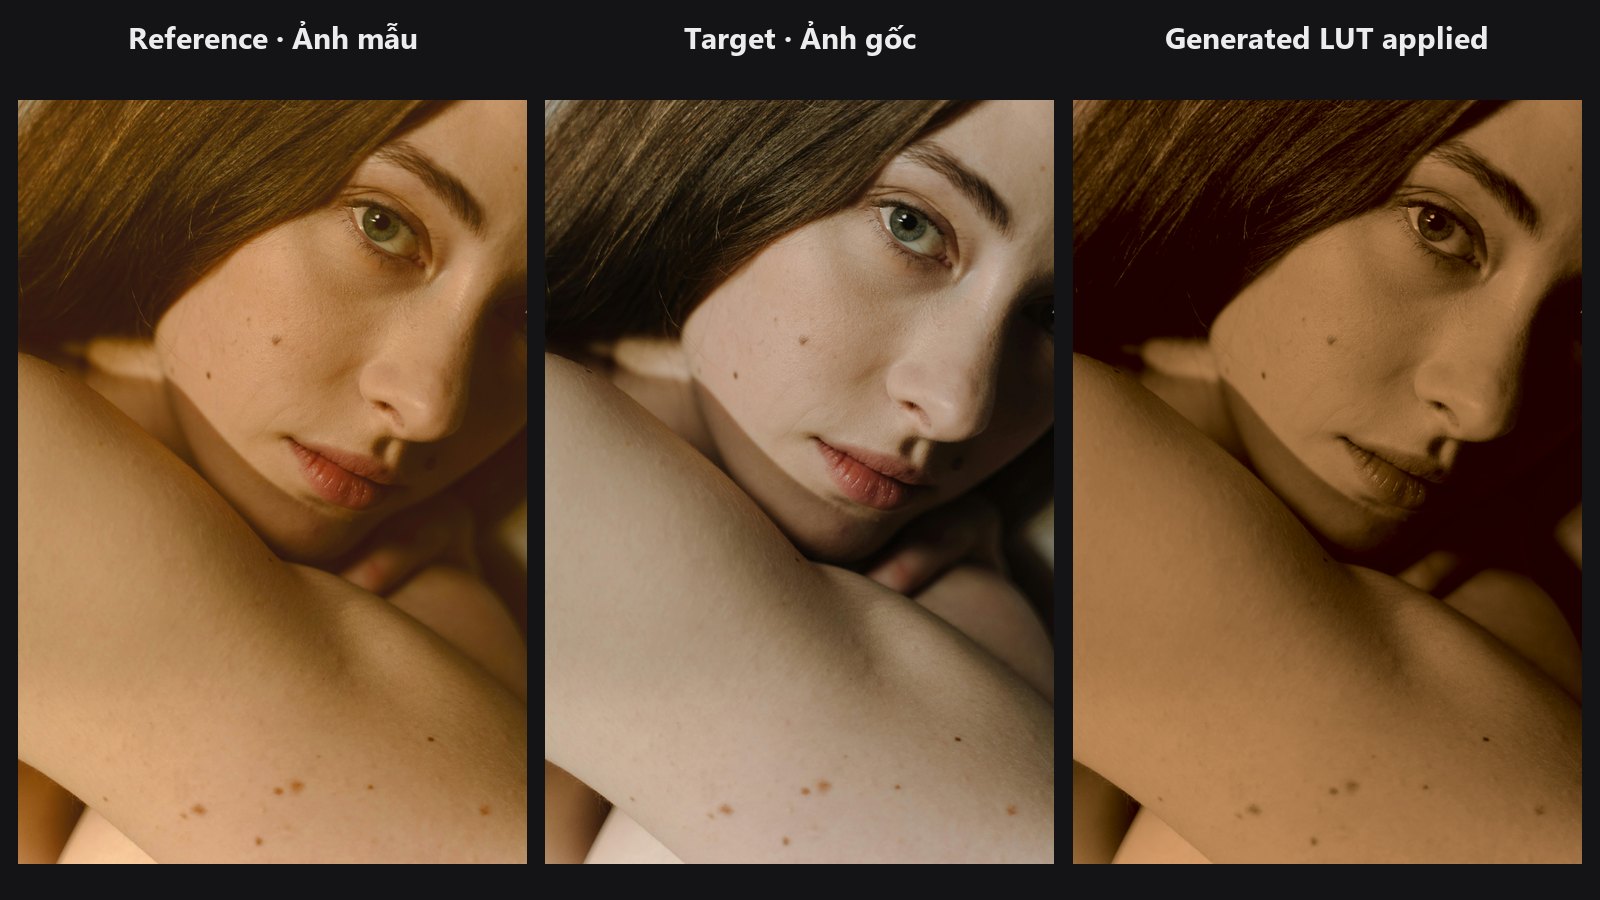
Give it a photo whose colour you love and it writes a LUT that pushes other images toward that look. No manual grading needed.
| In ComfyUI | Add Node → ComfyUI-JH-PixelPro → color → Tone Match LUT (auto-gen .cube) |
| Good for | Copying the feel of a reference shot, making a house look, matching a set of photos to a hero frame |
When to use it
Color Matcher matches one image to another, but only for that pair. Tone Match LUT does the same kind of colour transfer once and saves it as a .cube file. You can then apply the LUT to any number of photos with LUT Import, or open it in other apps that read Cube 1.0.
It captures overall colour and tone: the average colour, how widely the colours spread, and how they relate to each other. It does not copy local detail or content.
Quick start
- Connect Load Image (your reference) to
reference. - Leave
levelat8. Setfilename(for examplehero_look.cube). - Queue the prompt. The
lut_pathoutput shows the new file inComfyUI/output/. - Apply it with LUT Import. Copy the file to
ComfyUI/input/or use the full path.
Settings
| Setting | Default | What it does | Tip |
|---|---|---|---|
reference |
— | The image whose look you want to capture. | Choose a well-exposed frame with the colours you want. |
level |
8 | Detail of the LUT. Choices: 4, 6, 8, 10, 12. | 8 gives a 64-point cube, the standard for creative looks. |
filename |
tone_match.cube |
Output name. Relative names go to ComfyUI's output/ folder; .cube is added if missing. |
An existing file is overwritten. |
title |
Tone Match LUT |
Name stored inside the file. | Name it after the reference. |
Output: lut_path — the full path of the written file.
Tips from retouching
- Pick a reference that is representative. A reference dominated by one colour (a sunset, a green field) gives a strong, one-sided LUT.
- A grey or nearly colourless reference produces a LUT that changes almost nothing.
- Always test with LUT Import at
strength0.6 to 0.8 first. Automatic matches can be stronger than they look in the reference. - If the match is close but not perfect, do small fixes with Tone Curve after the LUT.
Under the hood
An identity HALD at the chosen level is converted to LAB and passed through an MKL (Monge-Kantorovich linear) transfer: a 3 × 3 matrix derived from the covariance of the HALD's LAB samples and the reference's LAB samples, plus the reference mean. If either covariance is ill-conditioned, it falls back to a mean-only shift. Results are clamped to the LAB range and converted back to RGB. A reference that is almost uniform grey returns the identity. The graded HALD is written with the same exporter as LUT Export. Earlier versions used histogram or mean/std matching; the current method preserves cross-channel colour relationships.
Related nodes
- Color Matcher — match two images directly, no file.
- LUT Import — apply the generated
.cube. - LUT Export — export a hand-built grade instead.
- HALD Identity — the chart used inside this node.
Example workflow
Tone Match LUT example workflow. A golden-hour copy of the portrait is the reference. Tone Match LUT writes a .cube file to ComfyUI/output/ and its path goes straight into LUT Import, which applies it to the original. Copy workflows/sample_portrait.jpg into ComfyUI/input/. It uses only core ComfyUI nodes and this pack.