Face Landmarks
Maps the face with 468 points (eyes, brows, nose, lips, jawline, cheeks). Those points are what the warp nodes use to reshape a face.
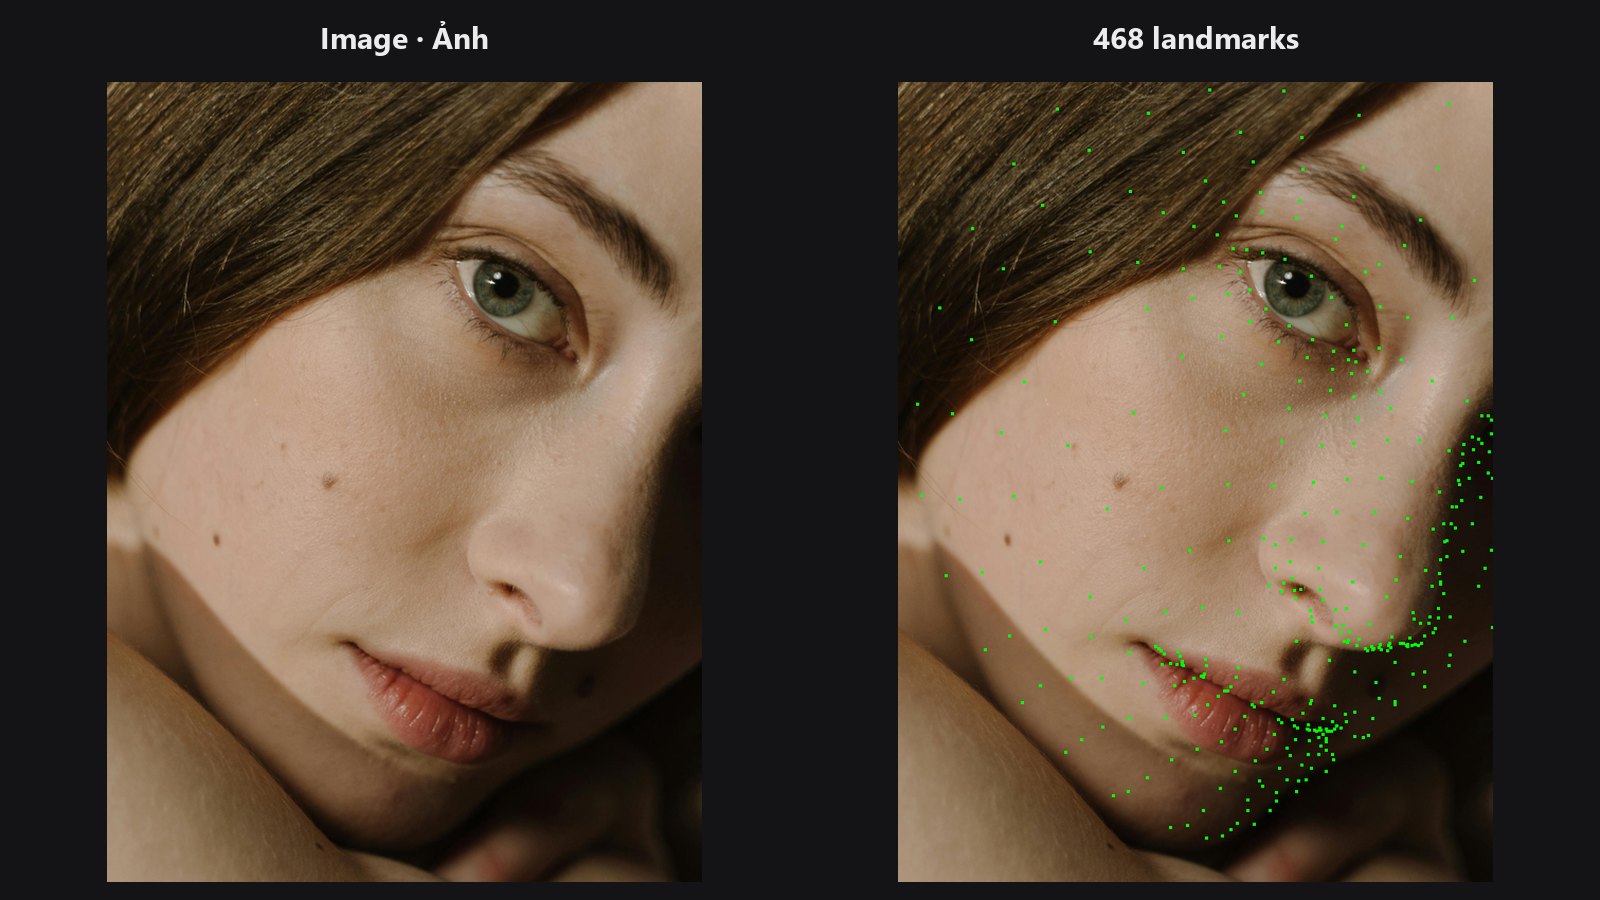
| In ComfyUI | Add Node → ComfyUI-JH-PixelPro → face → Face Landmarks (MediaPipe 468) |
| Good for | Feeding Face Warp or Face Warp TPS; checking how well the mesh fits a face |
When to use it
Five points are enough to straighten a face, but not to reshape one. To slim a jaw, lift an eye or copy an expression from another photo, you need a dense map. A landmark is a numbered point on the face, and the same number always sits on the same spot (for example the tip of the nose), so you can compare a face in two photos point by point.
Run the node once on your photo for the "source" points, and once on a reference or edited version for the "destination" points. Feed both into a warp node.
Quick start
- Connect Load Image to Face Landmarks (MediaPipe 468).
- Leave
draw_overlayon and look atoverlayin a Preview Image to confirm the dots sit on the face. - Connect
landmarkstosrc_landmarksof Face Warp TPS (or Face Warp). - Get
dst_landmarksfrom a second Face Landmarks node run on the target picture.
Settings
| Setting | Default | What it does | Tip |
|---|---|---|---|
max_num_faces |
1 (1–10) |
Most faces to find per image. Missing faces are filled with NaN (no data). | Keep 1 for portraits. The warp nodes use the first face. |
min_detection_confidence |
0.5 (0.0–1.0) |
How sure MediaPipe must be before a face counts. | Lower it if a real face is missed. |
refine_landmarks |
on | Kept for compatibility. The dense 468-point output is always used. | Leave as is. |
draw_overlay |
on | Draws the points as green dots on the overlay image. |
Turn off if you do not need the preview. |
Outputs:
| Output | Type | Meaning |
|---|---|---|
landmarks |
LANDMARKS |
The 468 points per face, in normalised [0, 1] image coordinates. Connect only to nodes that take LANDMARKS. |
overlay |
IMAGE |
Your photo with the points drawn on. |
Tips from retouching
LANDMARKSis a special type. It does not connect tolandmarks_jsonof Facial Aligner; use a face detect node for that.- Run the node on the same resolution as the image you will warp, or at least the same framing, so points line up.
- If a face is not found, its slot holds NaN. Warp nodes then return the image unchanged.
- Detection noise is real: two runs on slightly different crops disagree by a few pixels. For this reason Face Warp TPS has a
smoothnesssetting.
Under the hood
The node uses the MediaPipe FaceLandmarker (tasks API) and shares its model file with Face Detect. The result is a (batch, faces, 468, 2) float tensor, NaN-padded when fewer faces are found. The image is converted to 8-bit RGB for MediaPipe. The code lives in core/face_pipeline.py.
Related nodes
- Face Warp — Delaunay per-triangle warp.
- Face Warp TPS — smooth thin-plate-spline warp.
- Face Detect — the 5-point version for alignment.
- Face category overview
Example workflow
Face pipeline example workflow (Face Landmarks → Face Warp → Face Beauty Blend). Copy workflows/sample_portrait.jpg into ComfyUI/input/ first.